how I edit AI articles
Businesses and content marketers now use AI chatbots to write blog content. Nothing wrong with that, until you start to realize how everyone now sounds like everyone else.
The staccato fragments: “no fluff, no filler, just results.” The “It’s not X, it’s Y” punchlines. The littered em dashes (sorry, em dash police). You know the drill.
I’ve spent the last few months editing AI drafts at an SEO agency, so I can spot them from a mile away. Here’s the process I use to edit AI articles, in three phases: the brief, the outline, and the line edit.
Key takeaways:
- Editing AI articles well starts before the draft. Having a solid content brief saves you the most pain later.
- Most AI tells are patterns you can learn to spot on sight: staccato fragments, anaphora, passive voice, and colon-stuffed titles.
- Personality is the differentiator. Personal stories, lived experience, and real examples are what separate your piece from the authorless articles flooding search.
- SEO and LLM optimization is a final checklist, not the goal. Write for the reader first, and for Google and LLMs second.
phase 1: strategic editing
Ideally, before you paste your massive prompt into Claude or ChatGPT, you’ve got to figure out the strategic part of your blog content. That’s what a content brief is for.
A good brief helps you edit your piece so it achieves its intended purpose.
Here are some blocks you should fill out:
- Target audience: Who are you speaking to in this article?
- Goal: What is the objective of this content? Is it to get sign-ups or book calls?
- Stage in the funnel: Is it TOFU (awareness), MOFU (consideration), or BOFU (conversion) content?
- Target keywords: What are the target keywords or topics for this piece?
- Tone and brand voice: What should be the tone and voice of your blog?
- Product or service positioning: How do you intend to add your product or service to the narrative without it feeling forced or salesy?
- CTAs: What CTAs will you use in this post, and where will they be placed?
Here are two content brief templates to get you started. The first one is from Content Harmony, and the second is from Daniel Cheung.
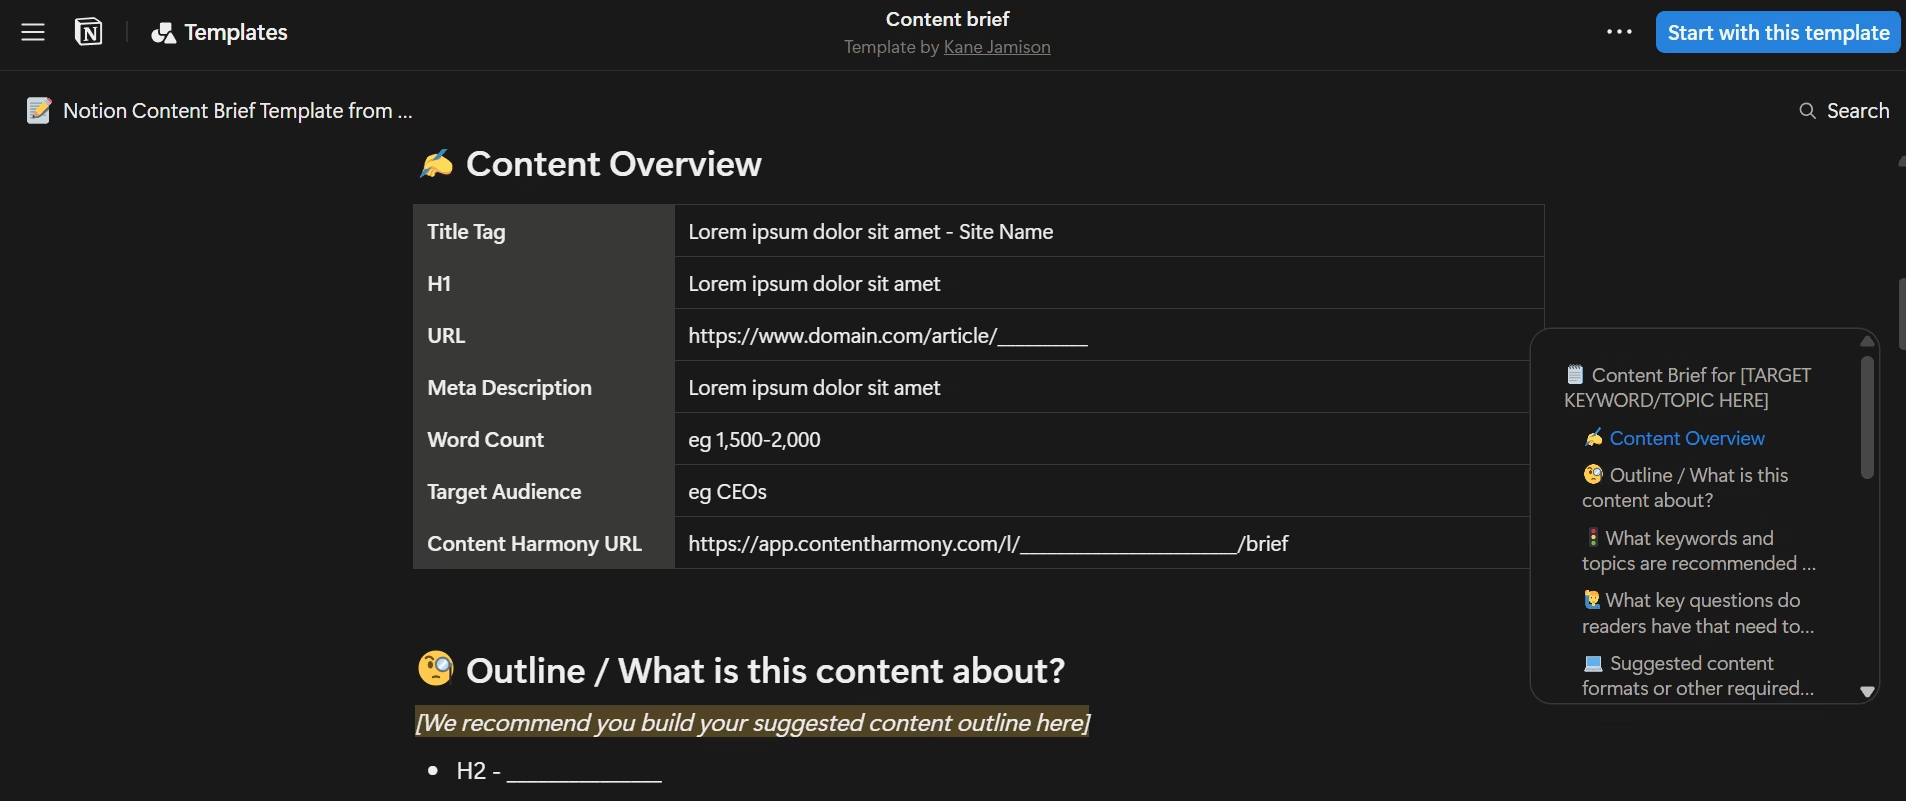
Source: Content Harmony
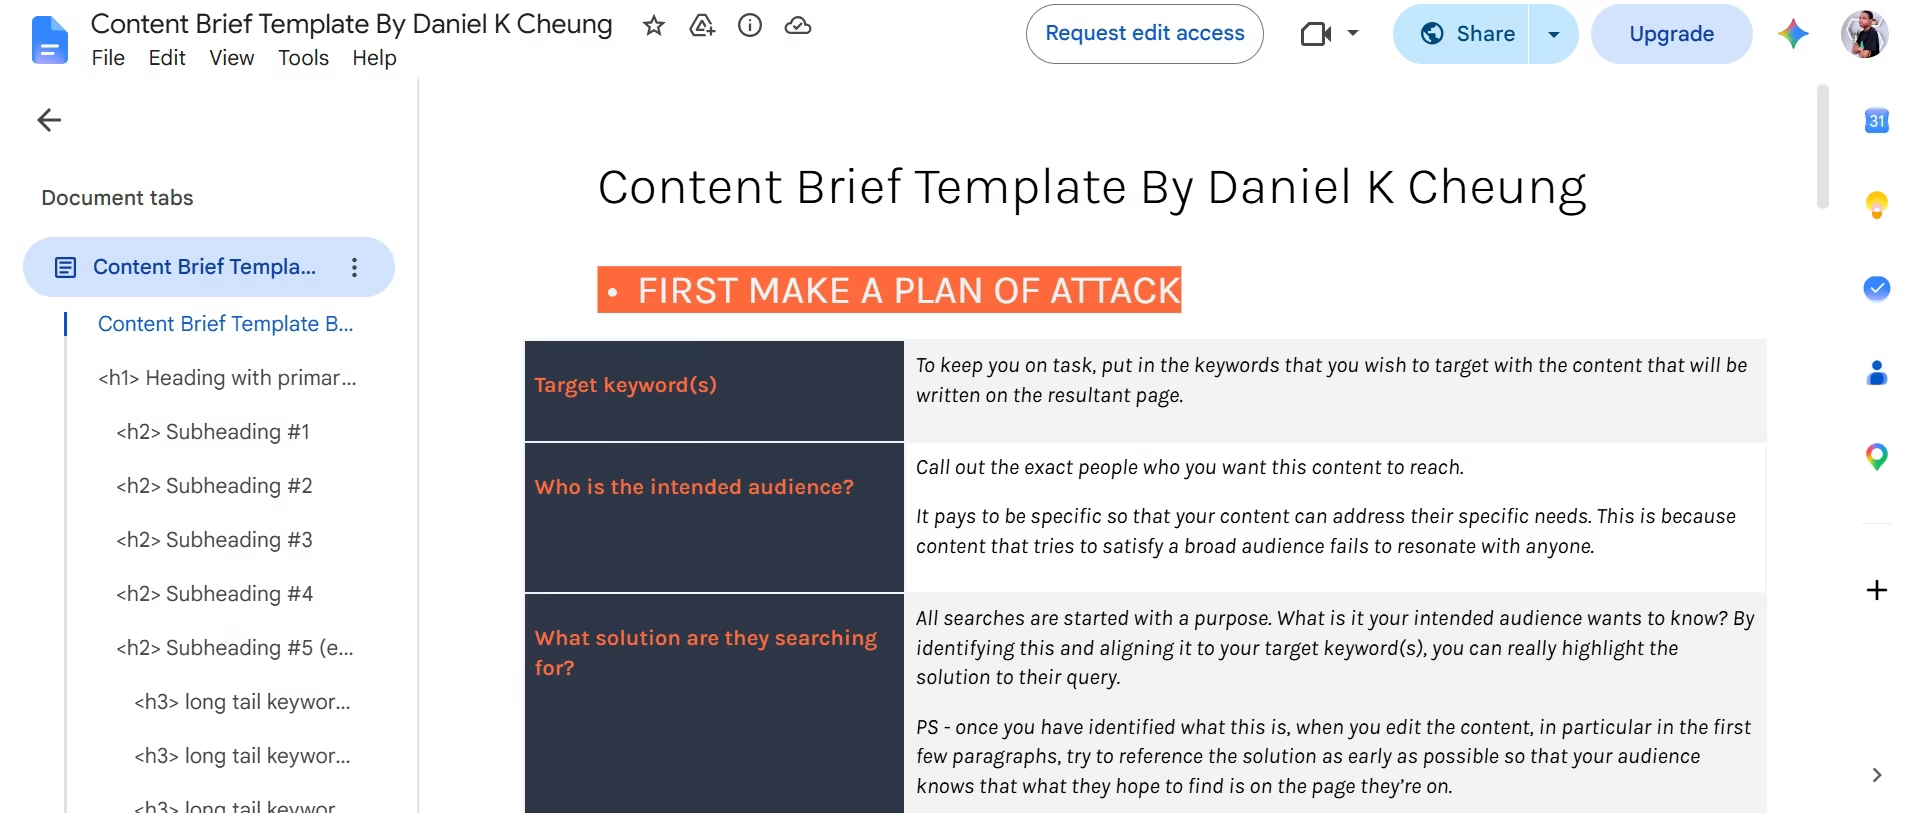
Source: Daniel Cheung
Use these strategic editing blocks while building your content outline in Claude or ChatGPT, and revisit them before you touch your AI first draft.
phase 2: outline editing
Some writers prefer to use one (super long) prompt to generate an article. I believe it’s better to sketch the outline first, by hand or with AI, and make your major edits there before you send it off to AI.
I get better results this way than with a one-shot prompt.
Note: If you use one-shot article prompts, you can skip this section.
Here are some rules I follow in the outline editing phase:
1. check if your outline covers everything your reader needs to know
Let’s say you’re writing an article about how to optimize a freelancer LinkedIn profile. Your content outline should list the complete steps for setting one up. You can use a basic prompt like the one below to get a quick outline.
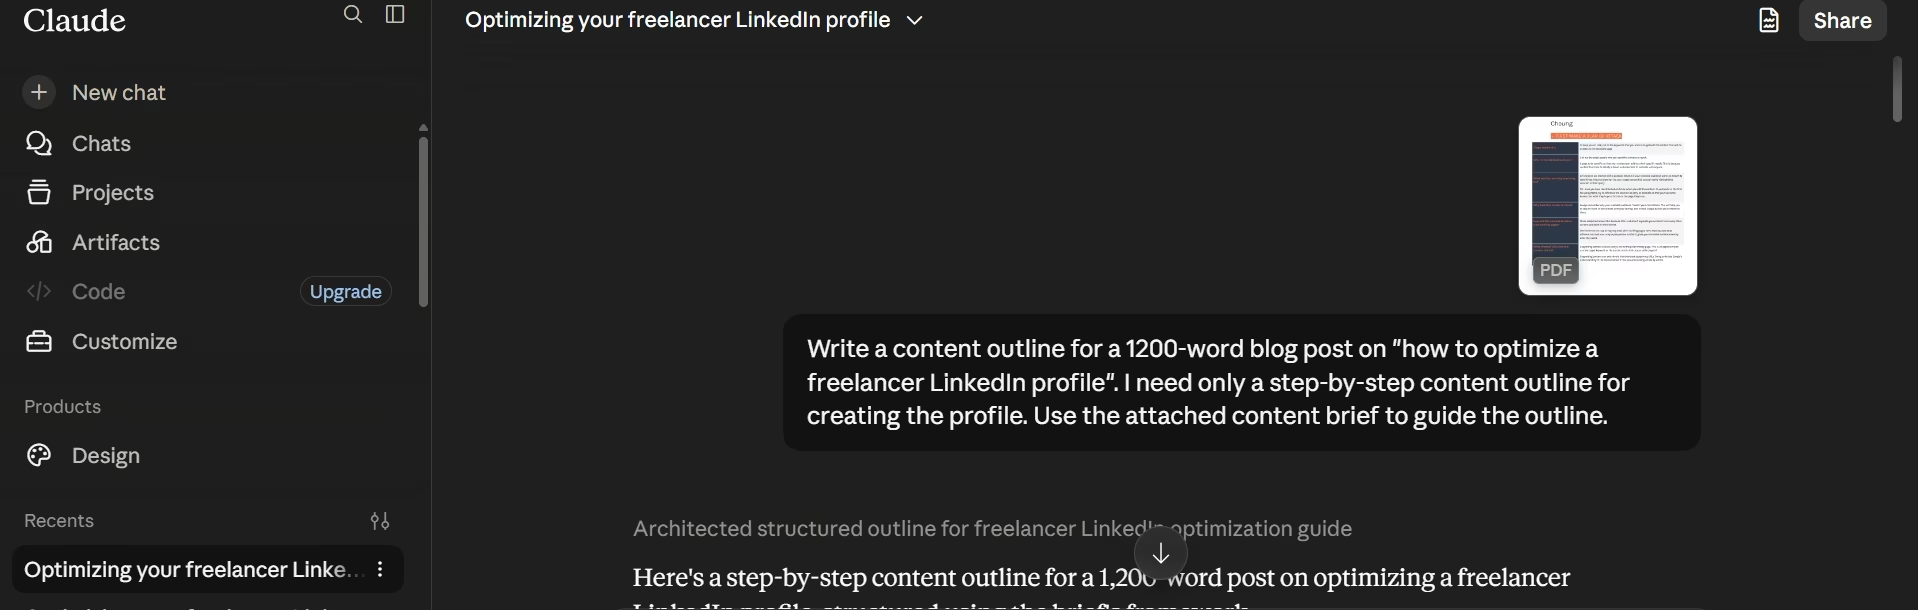
Don’t use AI outline drafts as they are, or you’ll end up with below-par content. I re-prompted Claude to list the H2s in the outline so I can quickly improve it.
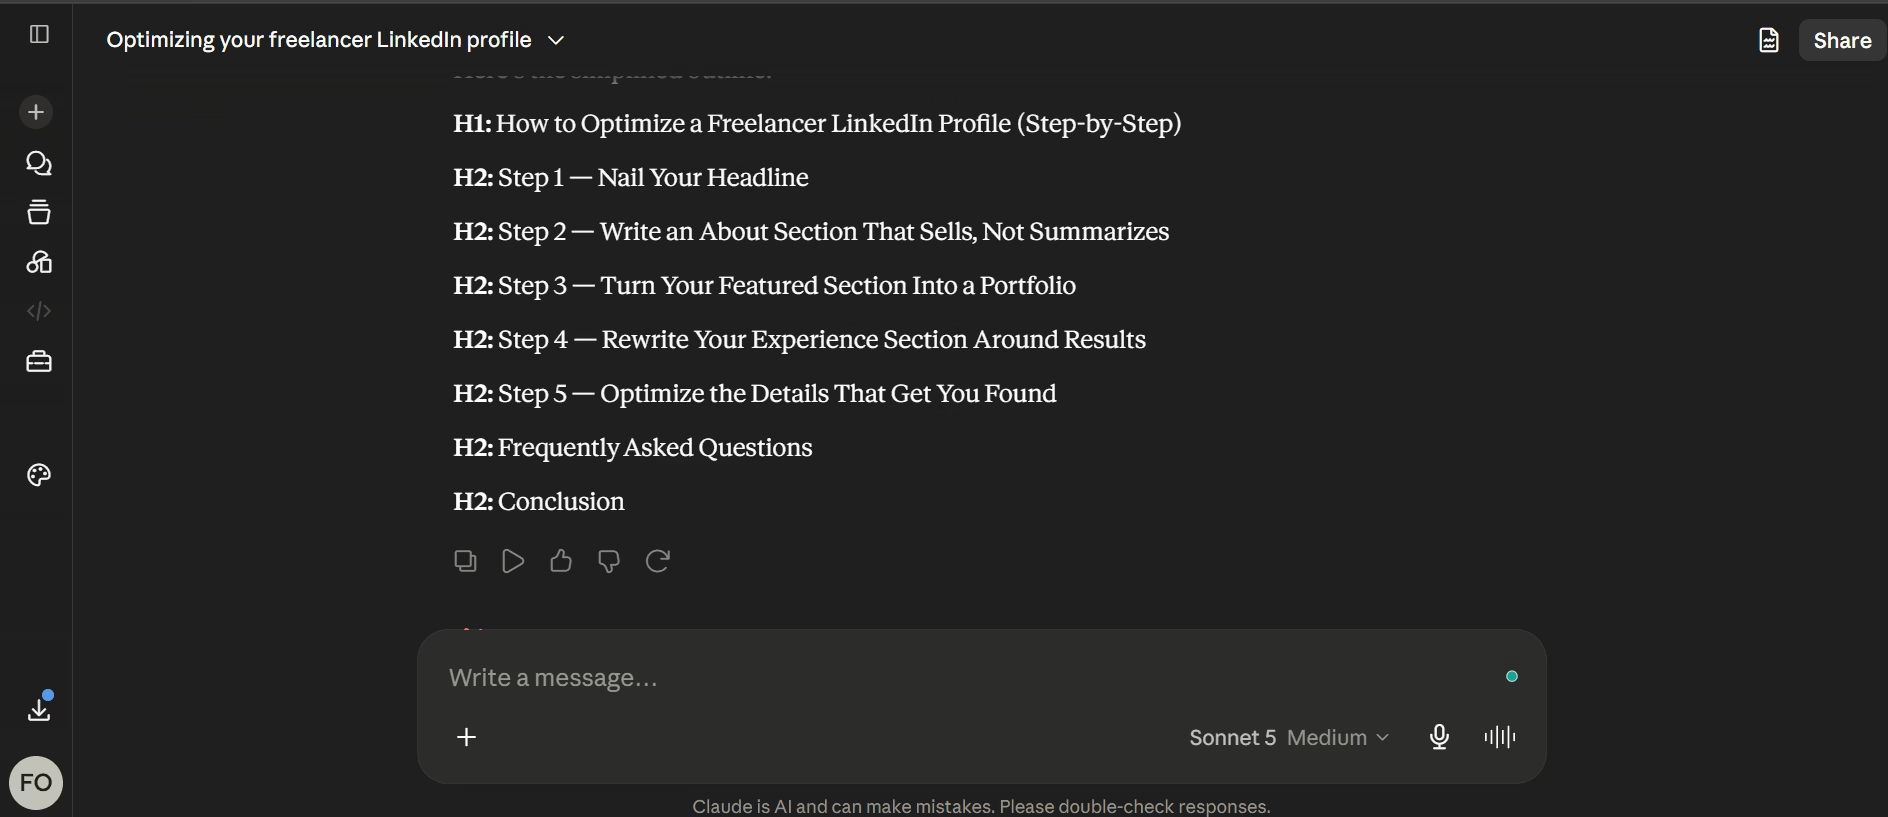
With a few touch-ups, we’ll get an outline like this:
H1: How to optimize a freelancer LinkedIn profile
H2: Use a professional headshot
H2: Nail your profile headline
H2: Design a banner that communicates your offer in two seconds
H2: Customize your LinkedIn URL
H2: Write a memorable about section
H2: Turn your featured section into a portfolio
H2: Show your results in the experience section
H2: Ask for recommendations from former clients
H2: Complete your remaining LinkedIn profile sections
H2: FAQs
H2: Conclusion
2. make sure your outline flows logically
Look through the refreshed article outline for the freelancer LinkedIn profile, and you’ll see the steps follow a logical order. It makes sense to write your profile headline before your About section, because the headline defines your LinkedIn positioning.
3. list the most important points first
Let’s assume you’re writing a blog post on tips for posting consistently on X (formerly Twitter). Your outline should prioritize the foundational tips that get your reader started.
It shouldn’t drift into minor tactics like liking and commenting on the posts of your ICP (ideal customer profile).
When your outline pushes the most valuable tips upfront, it answers the reader’s biggest questions and makes your content LLM-friendly, since models tend to lift direct, self-contained answers
4. chop off obvious headers
Sometimes AI adds subtopics to make the content feel whole. It might also repeat ideas as separate headers that could be combined into one point. You can’t blame the machines. They learned from us writers.
Some topics have been covered to death for years and don’t need a “what is X” and “benefits of X” opener.
For instance, an article on the “8 best B2B social media marketing strategies” doesn’t need to start with “what is B2B social media marketing” and “benefits of B2B social media marketing.”
5. give direct value in your headers
Your reader should be able to learn how to carry out a task simply by reading your headers from top to bottom.
We are skimmers at heart. Most people don’t read your blog post word-for-word, except your editor and a writer studying your work.
Descriptive, solution-focused headers can help your reader get a quick answer without wading through thousands of words. They also make your copy easy for LLMs to extract and cite.
Here’s a quick example:
H1: How to make home-baked breads
H2: Gather your ingredients
H2: Mix until a rough dough forms
H2: Knead until the dough becomes smooth and elastic
H2: Let it rise until it doubles in size
H2: Punch it down gently and shape it into a loaf
H2: Let it rise again until puffy
H2: Bake until golden brown
H2: Check for a hollow sound to see if it’s done
H2: Cool completely before slicing
6. simplify your header titles
Clear writing is easy to read. Tools like the Hemingway editor help you check the readability of your headers and body copy. Hemingway is especially useful for B2B SaaS or tech content.
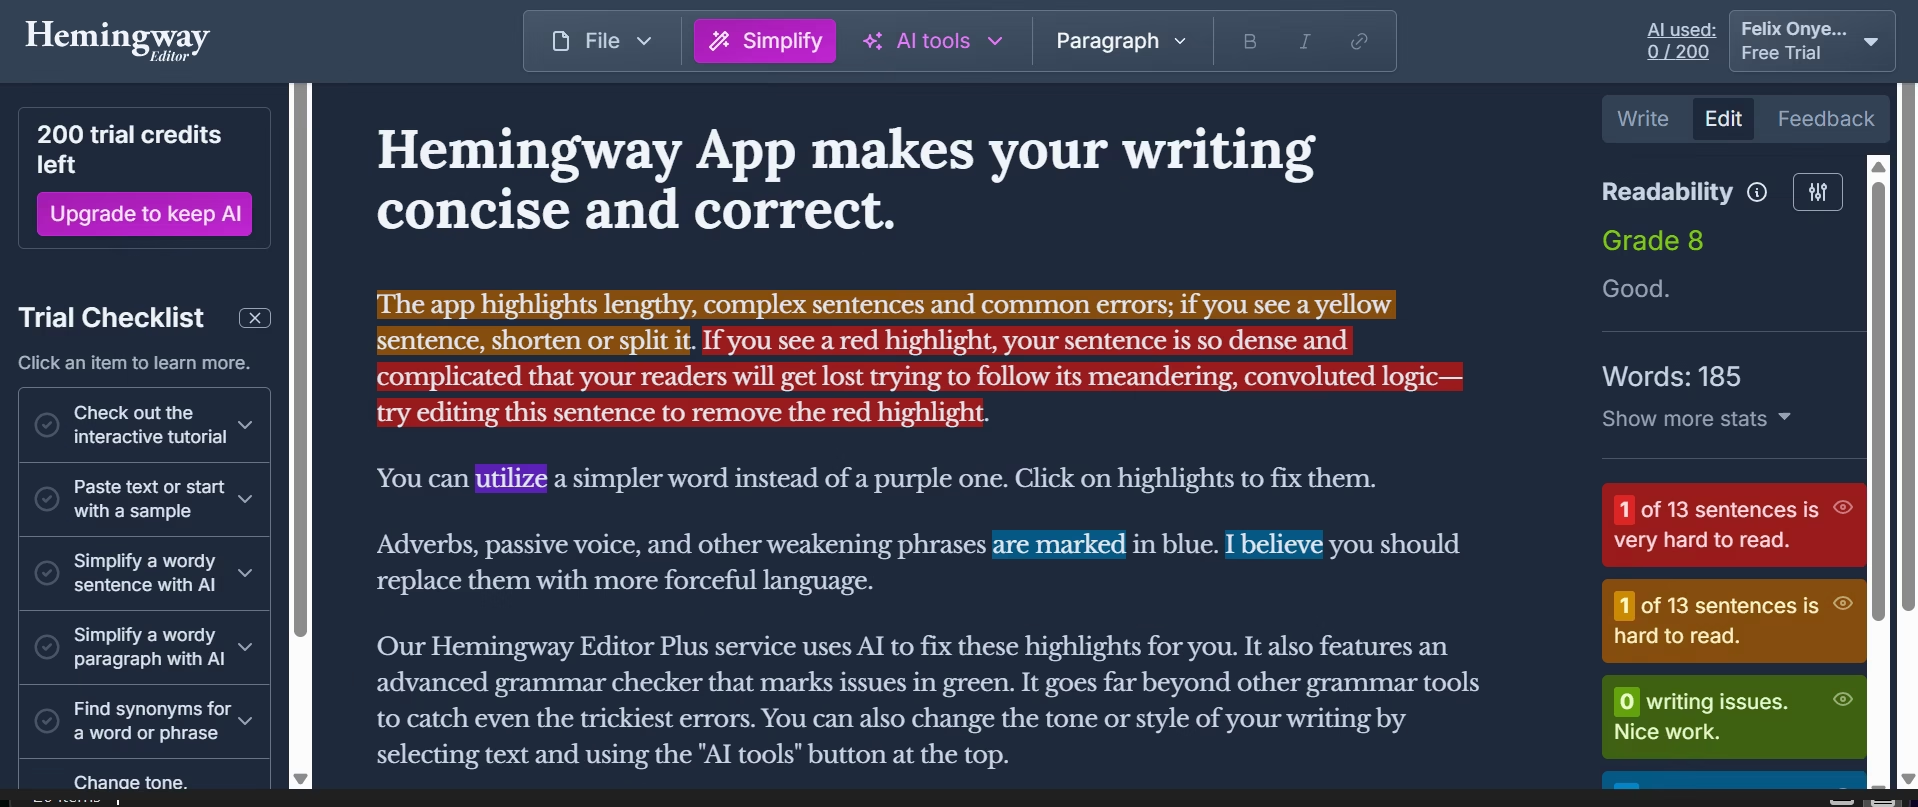
Source: Hemingway
7. deliver on the promise of your article title
Your outline should spell out exactly how the reader solves their problem.
For example, a blog post titled “6 best time-tracking apps for small businesses” should deliver your first-hand experience with each app. It could also include pros and cons, features, pricing, and so on.
phase 3: line editing
I’ll admit this is the most frustrating stretch of my editing process: cleaning up AI articles and deleting AI tells. Friend, no matter how good your outline is, AI will always be AI.
Uploading human writing and brand voice guidelines to your Claude projects gives you a better output. But you’ll still have plenty of editing to do.
Now the hands-on work. Below are the recurring fixes I make on almost every AI draft, and the AI tells that give the game away.
1. read your first draft without editing
Reading it straight through helps you evaluate the draft fairly and see whether it aligns with your content marketing strategy. After that, use your content brief to direct major edits.
2. rewrite your H1s, meta titles, and meta descriptions
Don’t leave your H1s and meta titles to AI because they determine whether your posts get clicked on SERPs or ignored. I use AI to bounce ideas around for both, then rewrite from there.
I always, always edit my AI meta descriptions too, especially when they read anything like this:
“Discover how Ghost compares with other publishing platforms, including its features, pricing, and performance.”
Here is my rewrite:
“I tried Ghost for three weeks and wrote my honest take on its features and performance. See what surprised me.”
3. add personality to your intro
Most of the time, your AI article’s intro will be boring or average at best. Take your time to add your own personality and use the exact words your target audience uses.
Sometimes I prompt Claude to create two to three intro versions using different copywriting formulas.
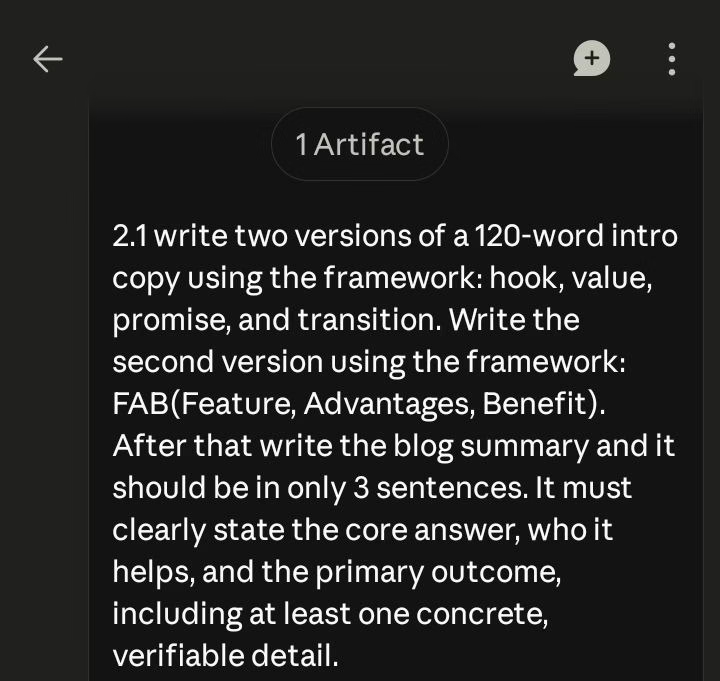
Then add a CTA or bridge after your intro to move your reader to your H2.
4. fix your grammar
While editing AI drafts, I notice fewer grammatical errors in short articles (1,000–1,500 words).
I also find that AI struggles with punctuation, especially commas and semicolons. Grammarly handles this sort of cleanup.
5. fact-check your article
Read your AI draft to verify claims, stats, numbers, product features, and anything that looks off. You’ll need basic research or prior knowledge of the topic to spot inaccuracies.
I paste my AI article into Perplexity to catch anything I might have missed.
Here’s the prompt I use:
Fact-check the article using authoritative sources and [website URL]. Flag anything inaccurate and organize it in a table along with the section and correction. Prioritize original sources over roundups and leave out marketing claims.
6. refine your content tone
AI struggles to capture a client’s brand voice. It over-corrects and goes to extremes to avoid certain words, or keeps the exact phrases I flagged in my prompt.
I fix this by reading my content out loud. My ear catches what my eyes sometimes skim past.
7. tighten your sentences
Some words we use in speech add very little value on the page. Weak words like things, something, very, actually, really, genuinely, and just creep into AI drafts and dilute your point. Cut them.
Varying sentence length, a habit I picked up from Ryan Law’s editing course, makes your copy easy to read. Go short, medium, short, long, and find a rhythm.
AI leans on too many short sentences when I tell it to write casually, so you’ll have to consciously vary them yourself.
Say as much as possible with the fewest words. AI tends to meander around ideas through long sentences. In such cases, cut them down to simple words that carry your point.
8. back your points with examples, stories, and proof
Show, don’t just tell. Use screenshots, images, infographics, videos, charts, and graphs to make your points concrete. A reader grasps an annotated screenshot faster than three sentences describing it.
Weave in personal stories (if you have any), lived experiences, and figures of speech such as similes, analogies, and metaphors, to make your copy relatable.
Make your content credible with authoritative stats from sources like .gov sites, research papers, and industry reports, plus case studies, surveys, and quotes from subject-matter experts.
Again, make sure the stats are from original sources and current, ideally no more than three years old.
common AI sentence structures
I’ve worked a lot with AI first drafts, and these are the glaring AI patterns I catch often:
- Sentences that open with “from,” “for,” and “by.”
- Continuous verbs stitching clauses together: making, offering, and enabling. E.g., “We spent the afternoon at the water park, making it one of the best weekends of the summer.”
- The “It’s not X, it’s Y” pattern. E.g., “Gamma isn’t just another presentation tool. It’s an AI workspace for presenting ideas.”
- Overuse of “whether” to compare reader scenarios in intros and conclusions.
- Setup phrases: “here is the thing,” “here’s why this matters,” “the truth is,” “let that sink in,” “think about it,” “the best part?”
- Anaphora. E.g., “Every word matters. Every sentence shapes the message. Every story leaves an impression.”
- Too many sentences starting with “that”.
- Staccato fragments like “No prompts. No guesswork. No frustration. Just clarity.”
- Passive voice.
- Vague filler. E.g., “Success starts with the right strategy.”
- H1s or titles with colons. E.g., “Semrush: Your Complete Digital Marketing Platform.”
- Overconfident claims like “This solution works for businesses of all sizes, across every industry.”
Spot these, and rewrite them in your own voice.
SEO and LLM optimization checklist to edit AI articles
Here’s my SEO and LLM optimization checklist for editing your AI articles for search and LLM visibility:
- Use the primary keyword naturally in the meta title, H1, H2s, meta description, and body
- Use the secondary keywords in H2s, H3s, and body copy
- Cover related entities and topics around the main keyword.
- Place the primary keyword in the URL slug
- Break up your article with short paragraphs, subheads, bullet points, tables, and images
- Link to related blog posts and product or company pages with descriptive anchor text
- Cite authoritative sources and statistics
- Add a “key takeaways” or “blog summary” section after the H1 or intro
- Use question-style headers where possible
- Include an FAQ section for LLM visibility, where the topic raises real reader questions
- Write concise, direct sentences that are easy to cite in AI Overviews and LLMs
- Write for the reader first, Google and LLMs second
- Make sure the article satisfies search intent
- Define technical terms clearly on first use
Want proof this works? Here’s how one DA5 site earned citations in AI Overviews ahead of higher-authority competitors.
go forth and edit your AI article
It’s easy to check off SEO and LLM optimization boxes, fix the grammar, delete every em dash, and call it a day. But edited that lightly, your AI copy still reads like the thousands of authorless articles drifting through the internet.
Put this process to work instead, and if you want a repeatable system for the editing itself, steal Oyinkansola’s TALK self-editing framework.